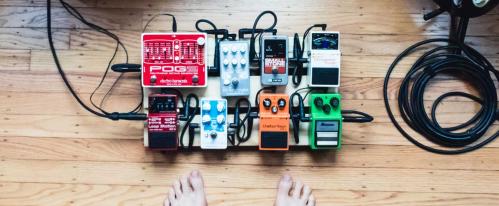
IF YOU’VE EVER WONDERED HOW TO BUILD A GUITAR PEDAL BOARD OR WOULD LIKE TO KNOW HOW TO SET UP A PEDALBOARD, WE SHOW YOU EXACTLY WHAT YOU NEED AND THE PERFECT PEDAL BOARD ORDER WITH OUR COMPLETE GUIDE TO SETTING UP YOUR DREAM RIG.
If you’re reading this article, then it’s probably safe to assume that you’ve got a few effects pedals kicking about and you’ve decided to put your first pedalboard together. But figuring out what you need to get set up can be a little daunting at first, especially if you’re unfamiliar with the cables, leads and power supplies you may need and where your pedals go in the “Chain”.
Thankfully, the whole process of building a pedalboard is fairly easy once you know exactly what you need, so today we’re going to show you how to put a complete pedalboard together, what guitar pedals you should get first and how to place your pedals so you get the best sound. Check out this quick tutorial on how to build a pedalboard too:
WHICH GUITAR EFFECTS PEDALS DO I NEED?
If you want to build a pedal board, you’re going to need pedals! Let’s say you’re a newcomer to the world of pedals, but you sort of know what kind of sound you want, and you know you’ll want enough to warrant a pedal board.
So let’s take a look at the essential pedals you’ll need. These are just a few examples based on the most commonly used pedals and industry-standard options.
TUNER PEDAL
If you want to gig, you need a tuner pedal. Fact. Don’t try and tune by ear on stage - it’s annoying and you’ll likely get it wrong, so get something you can actually rely on!
The BOSS TU-3 tuner pedal is widely regarded as the industry standard.
Reliable, easy to use and built like a tank - this thing will last forever and it comes with the BOSS 5 year warranty.
The TC Electronic Polytune 2 Tuner Pedal is also a great option as is the budget-friendly Blaxx Tuner Pedal.

DISTORTION OR OVERDRIVE PEDAL
Not all amps have distortion channels, so if you want to get those heavy tones or want to blow people’s minds with a crunchy riff, you’ll need a distortion pedal to do it.
The budget-friendly BOSS DS-1 is one of the most widely used distortion pedals in the world. It sounds unreal through any amp or guitar and is completely reliable too.
Everyone from Kurt Cobain to Steve Vai uses it.
Another great option is the MXR M69 Prime Distortion Pedal or if you want to open up your options, the Strymon Riverside Multistage Drive Pedal has a world of tone at your feet.

MODULATION PEDALS
Modulation pedals are your chorus, phase, flange, vibrato, and tremolo style pedals.
A great chorus pedal is the Electro Harmonix Nano Clone and an awesome phase pedal can be found in the MXR Phase 90.
The Boss BF3 Flanger is a great start for those who want a reliable flange pedal, and the BOSS VB-2W provides a lush vibrato to your signal.
If you like the tremolo sound, you can’t go wrong with a BOSS TR-2 or Landlord FX Spinning Room Modulation Pedal.

REVERB PEDALS
A reverb pedal can add some serious weight to your sound, making guitar lines sound richer and fuller.
Two great options come in the form of the Electro Harmonix Nano Holy Grail and Strymon Blue Sky Reverberator Pedal.

DELAY PEDALS
If you like the sound of echoing guitar lines in your music, then a delay pedal is definitely for you.
A delay pedal can completely change how a guitar solo sounds, adding some rich textures to your playing along the way.
There are many popular delay pedals out there, but the Electro Harmonix Deluxe Memory Man, MXR Carbon Copy, and Strymon Timeline Delay are arguably some of the best in the world.
If you’re on a budget, the Landlord FX Taproom Delay Pedal is a great starting point.

WAH PEDALS
If the terms Jimi Hendrix, 80s metal, or Black Sabbath appeal to you, chances are you’ll like the sound of a wah pedal.
There’s a lot of options out there but you can’t go wrong with Dunlop Cry Baby, Vox V847 Wah-Wah fx pedal, or the new (and budget-friendly) Electro-Harmonix Wailer Wah Pedal.

EQ PEDALS
If you’re a beginner, chances are you won’t really need an EQ pedal, as you’re just getting to grips with your sound.
However, if you’re a little longer in the musical tooth, you might find that you prefer more bass, mids or treble in your sounds than what is available in your rig.
In this case, an EQ pedal is your best friend.
The MXR 6B Equalizer Silver Pedal SIX BAND EQ gives you the option to adjust your sound to your liking, as do the Boss GE-7 Equalizer.

COMPRESSOR PEDALS
A compressor pedal will even out your sound, so there are no unwanted peaks or troughs in your sound - perfect for guitarists who use vintage valve amps that might not respond so well to the intricacies of your playing.
When you use a compressor, each note you play will be heard at the same volume and really bring out your sound.
The Strymon OB1 Clean Boost Compressor Pedal is a great professional compressor, as is the MXR M102 Dyna Comp Compressor Guitar Pedal.

LOOPER PEDALS
Loop pedals are great to lay down some chords or riffs and jam along to, but they can offer so much more.
You can create entire songs with a looper and add a new dynamic to your live set.
We actually wrote a blog on the best looper pedals, which showcases some great pedals including the Electro Harmonix Nano 360 Looper.
The Boss RC-1 Loop Station Pedal and Landlord FX Happy Hour Looper Pedal are also great options ranging from beginner to expert, but both equally as useful.

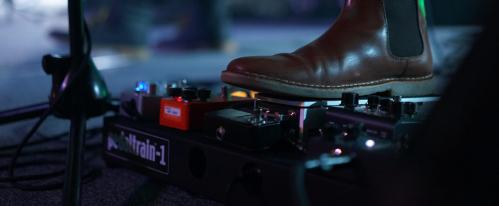
SHOULD I GET A PEDAL BOARD?
If you’re reading this article, then you’ve probably already made your mind up.
Either that or you’re sick of kicking your pedals across the stage by accident! Hey, it happens!
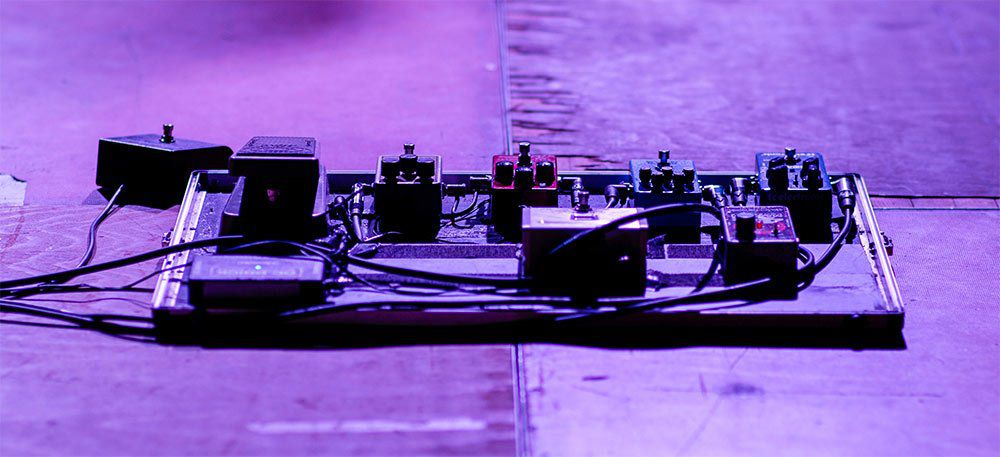
If you have more than one effect pedal, whether you're vocalist, guitarist or bassist you’ll benefit from owning a pedal board, as it provides a handy way to transport your effects pedals and keep them safe when in transit. It also keeps your pedals in one place and exactly where you left them on your board in between gigs.
Here are some reasons why you should get a pedal board:
EASY TO CARRY
Carrying a bunch of pedals around in a plastic shopping bag is OK when you’re in high school, but once you want to start gigging properly, you’re going to need a safe way to transport your gear.
A pedal board provides you with an easy way to carry all your pedals, leads, and any other bits you might need for your gig or performance.
Just throw them in your pedal board, lock them down with Velcro or cable ties (we’ll give you some tips a little further down) and you’re good to go! It also keeps your leads safe too!
YOUR PEDALS WON’T MOVE AROUND
The best way to keep your pedals safe is to lock them down with Velcro or cable ties. The reason you need to do this is that your pedals have quite sensitive settings.
When they move around in your bag chances are your settings might change and when you get to the gig everything will sound weird.
Yes you can mark your pedals with your ideal settings, and most musicians do, but locking them in one place means your feet get used to where they are going to be and your pedals have less chance of becoming damaged when you’re throwing your board into the back of a van for months on end on tour!
CHANGEOVER IS QUICKER
A big part of playing live is setting up and packing down. If you’re playing with other bands, there's usually a 15-20 minute changeover.
That means you have maybe half that to set up your gear whilst the other band packs down, or vice versa.
If you take any longer then your set is cut short, which could mean the difference between playing your full set or having to drop a few songs. With a pedal board, all you have to do is take the lid off or remove it from the case and you’re completely good to go.
The settings are where they should be and the leads are connected. Simply power-up, plug-in and you’re all set. Time is of the essence at gigs, so don’t be that dude who turns up and takes ages to pack down on stage!
WHAT DO I NEED TO BUILD MY PEDALBOARD?
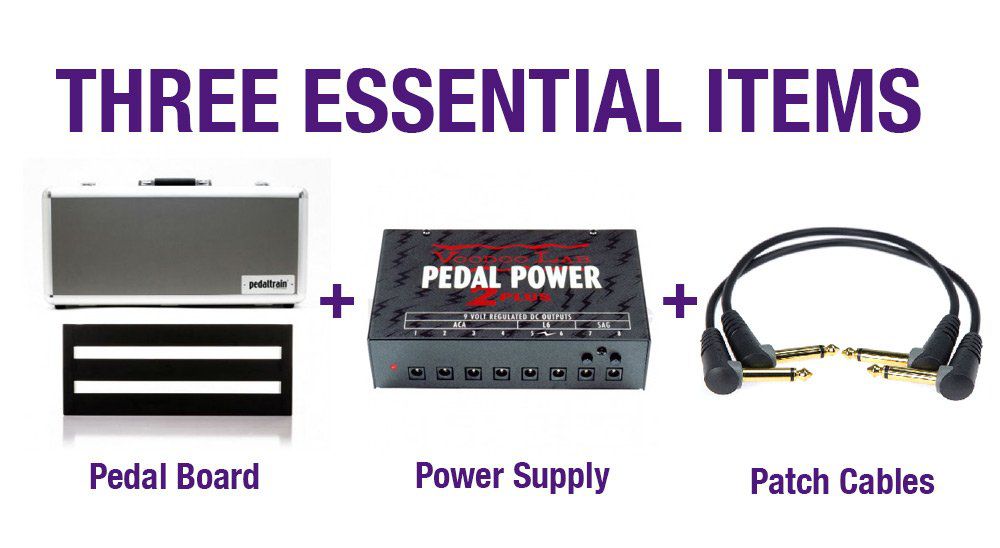
So now you’ve finally decided to build your own pedal board, you’re going to need the right gear to set it up correctly. Aside from pedals you’ll need to decide on three essential items, namely the pedal board itself, some patch leads and a power supply to power the board. Let’s a take a look at a few options.
PEDAL BOARD
When you’re deciding on a pedalboard, you need to take two things into consideration before you buy:
- How many pedals do I want on the board?
- Am I going to buy more pedals?
The amount of pedals you want on your board will dictate how big your board needs to be. You’ll also need to think about whether you’ll want more pedals further into your musical career.
Whether you choose to build your own out of a plank of wood and some handles, or you buy a ready-made, lightweight board that comes complete with handy carry case - just save some room so you don't have to keep buying more boards.
If you’re just starting out on your musical career, chances are you won’t have a great deal of pedals (yet!) so you won’t need a massive pedalboard. However, you’re still going to need to carry it and be able to rely on it to hold your pedals down.
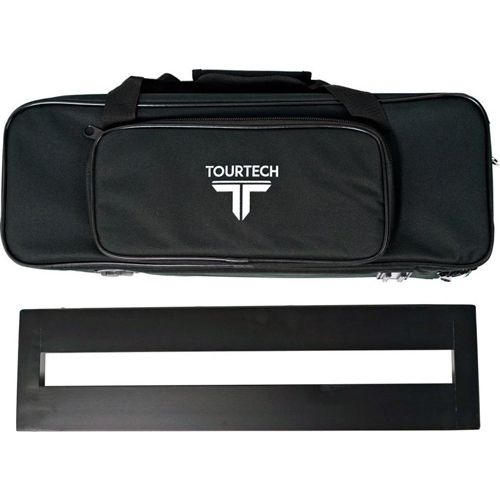
FOR BEGINNERS
Option 1: Pedaltrain and TOURTECH make fantastic pedalboards for everyone from beginners to professionals.
For the beginners, we recommend the likes of the TOURTECH Pedal Board with Soft Case, Small which comes complete with a carry case for easy handling and transport.
FOR BOSS ENTHUSIASTS
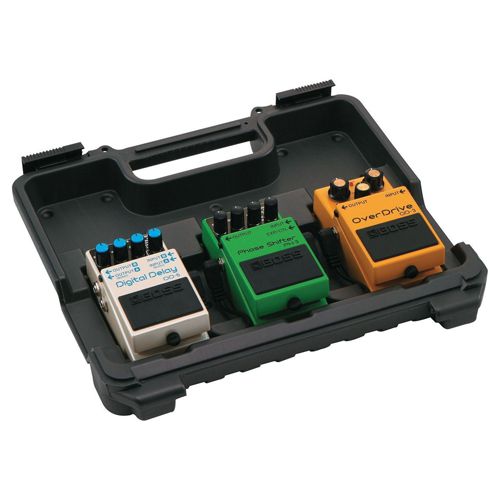
Option 2: If you’re only using BOSS pedals so far, the Boss BCB30 Pedal Board is a great starting point that holds up to 3 pedals and will power them too!
FOR THE TRUE PEDAL ENTHUSIAST
Option 3: If you have a lot of pedals, or the time has come to upgrade your board, the Pedaltrain Classic Pro Pedalboard with Tour Case is a professional grade board that can comfortably fit a great delay of pedals on.
It also comes with zip ties so you can keep your pedals secure and has room for your pedal power supply underneath. The angled design makes pedal switching more comfortable too!

PATCH CABLES
You’ll need to connect your pedals together so the signal travels through your board correctly. We’ll get to how to order your pedals in a moment, but for now, you need to make sure you get hold of some high-quality patch cables.
Whether you call them patch-leads or patch cables, one thing that can’t be contested is the importance of quality. You’ve spent a fortune on a good guitar, amp, and guitar effects pedals, so why would you ruin the signal with some dodgy leads?!
THE BUDGET-FRIENDLY OPTION
Some great options come in the form of the TOURTECH Deluxe Mono Patch Cable, 10cm because they're under £3.
They’re right-angled so you can get your pedals close together and save room, and they’ve got gold-plated tips for superior sound quality. Budget friendly and reliable!

SOMETHING A LITTLE FLASHIER
If you want to add a bit of color to your pedalboard, the Fender Custom Shop 15cm Jack Cables in Tweed are really cool.
Strong, sturdy, and reliable - just like fender guitars, these cool looking cables are professional quality patch cables with an extra thick 8mm diameter black PVC jacket to reduce handling noise and keep your connections safe.

CRAFT YOUR OWN CABLES
When putting your pedalboard together you might find that you have too much space in between your pedals, or you want them set up in a certain way that the length of regular patch cables just won't do.
Or you simply just want to make your own!
Well, in either case, the team at D’Addario Planet Waves has (yet again) come up with an amazing solution that allows you to create your own custom length patch cables.
The Planet Waves Solderless Custom Cable Kit gives you 10ft of cable, 10 right-angled Jack plugs, a screwdriver, and a mini cable cutter so you can make up to 5 patch cables to the size you want in around 30 seconds.
A much cheaper and easier to use version than the likes of George L’s custom cables.

Here's how you make your own patch cables with the D'Addario Planet Waves Solderless Custom Cable Kit:
- Step 1) Measure out how much cable you need
- Step 2) Use the included cable cutter to cut your patch cable to size
- Step 3) Unscrew your patch connector with the included screwdriver
- Step 4) Insert your cable all the way into the connector
- Step 5) Turn screw until it can't turn anymore - repeat for both sides
- Step 6) Gently pull both connections to ensure they're on
- Step 7) Plug in to your pedal and you're away!
PEDAL POWER SUPPLY
Getting a good quality pedal power supply is essential. Forget batteries as they will inevitably let you down. If you rely on batteries, chances are something is going to wrong especially if you forget to disconnect your patch cables or forget to change a pedal out for a gig.
Repeat: DO NOT RELY ON BATTERIES!
OK, that’s that rant over!
A pedal power supply does so much more than make your pedals work, it ensures you have enough power flowing through your pedals so you get the best sound possible. If you don’t have enough current (mA) or voltage flowing into your pedals, they will either sound weird or simply won’t work at all.
Most pedals use 9v power and an average of up to 500mA of current to work correctly. If you have a BOSS pedal, you’ll be fine with almost any pedal power supply as long as it says 9V.
However, some pedals, such as early/vintage Electro Harmonix pedals and some Line 6 pedals require a higher voltage of 12, 18 or even 24 volts, so that can be a bit tricky. For now, we’ll just assume that you’re using regular 9v pedals as this is fairly standard.
Isolated power is the key to buying a pedal power supply as it ensures each output delivers the right amount of power, eliminates hum, and ensures your pedals interact correctly with each other.
Cheap and “no-brand” pedal power supplies can be dangerous as they’re often not tested correctly and won’t deliver the right amount of power to your board, so it’s best to get a power supply from a reputable brand.
HERE'S A FEW OF THE BEST PEDAL POWER SUPPLY OPTIONS
If you’re not running many pedals together, you’ll be ok with a mains-powered DC adapter and a daisy chain, such as the TOURTECH 9V DC Power Supply, Universal 1000mA, and TOURTECH 5-Way Daisy Chain Pedal Power Cable.
Simply plug the AC Adapter into the mains and connect the Stagg daisy chain. From that, you can power up to 5 pedals.
This is a great start for beginners, but as the power is not isolated, you won't be giving all your pedals the exact amount they need, so don’t think of this as a long term solution.
Great for starting out, not great for professionals who’ve spent thousands on pedals.

The Voodoo Lab Pedal Power 2 Plus FX Power Supply is an industry standard pedal power supply that ensures your pedals have access to pure isolated power.
There’s also the option to change the voltage on a selection of outlets allowing you to choose from 9v, 12v, 12.3v and 14.5v power - great for those with different style pedals.
All the leads you need are included so you’re good to go straight out of the box.

One of the newer additions to the pedal power supply world has come in the form of the Strymon Ojai Pedal Power supply.
Although it has been designed specifically to power your Strymon pedals given the 500mA current, it will comfortably power all of your existing 9V pedals perfectly.
The team at Strymon has also built in an automatic international power compatibility feature so your pedals will sound as they should anywhere in the world - ideal for touring musicians.

WHAT ORDER SHOULD I PUT MY EFFECTS PEDALS IN?
Ok, you’ve decided on what pedals you want, the patch cables you need, the power supply that’s right for you, and the pedalboard to fit them all on. The next step is placing all your pedals on your board.
This is the tricky, but fun, part when the time comes to build a pedalboard! When figuring out how to order your pedals, you need to take into consideration how the pedals will interact with each other. There is a common or ideal way to layout your pedals to get the best sound, but music is all about experimentation - so the “correct” order may not be the best combination to your ear.
THE BEST GUITAR PEDAL ORDER IS:
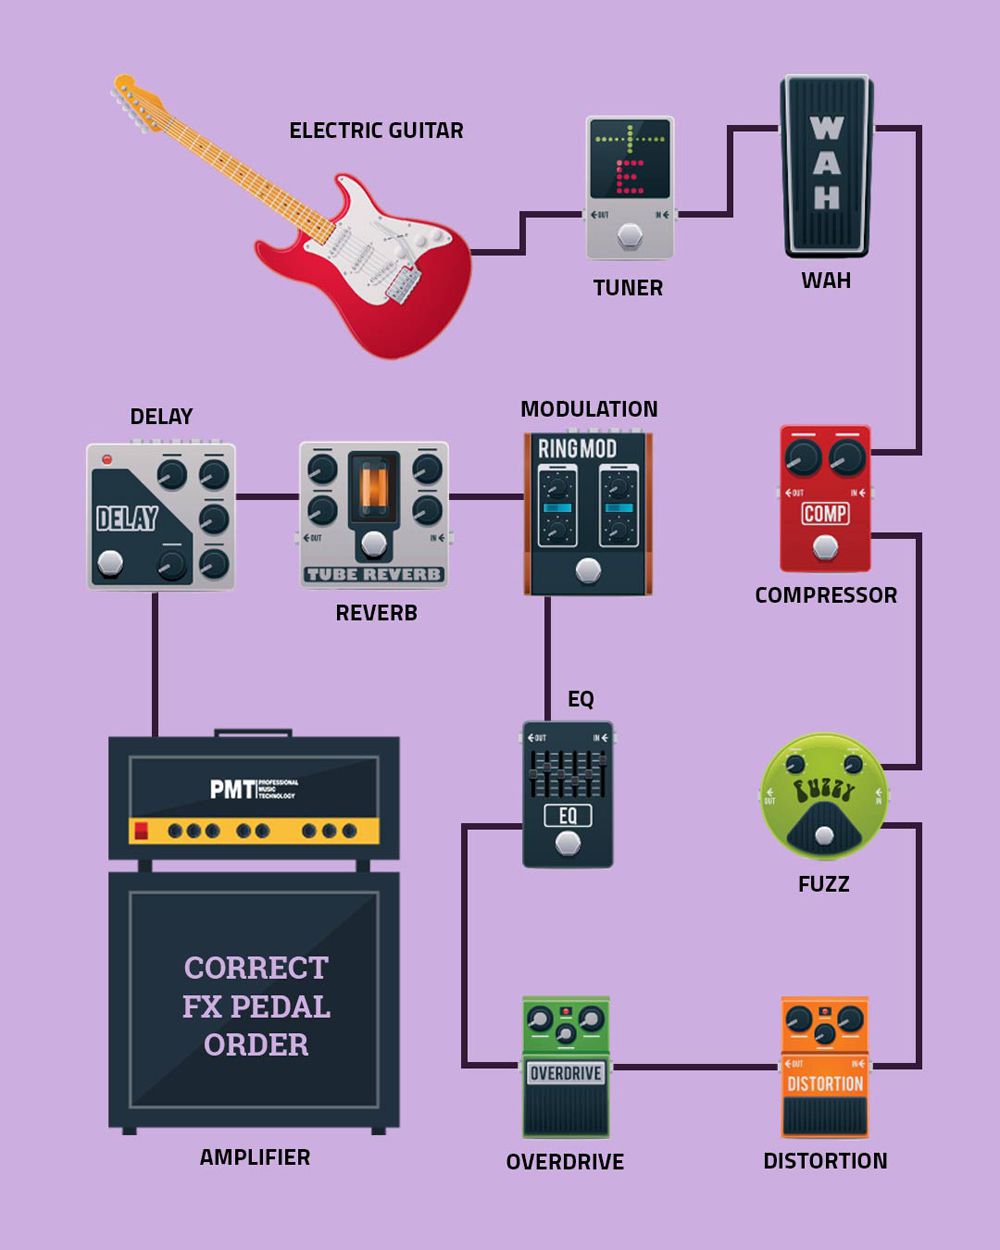
- Guitar/Bass
- Tuner
- Wah
- Pitch Shifters/Octave/Compressors
- Overdrive/Distortion/Fuzz
- EQ
- Modulation/Phase/Chorus/Flanger
- Delay
- Reverb
- Loop Pedals
- Amplifier
Of course, you may not have all these pedals and just a tuner, fuzz, delay and wah. So the ideal set up will be Tuner >> Wah >> Fuzz >> Delay. Here’s why the order is important:
STEP 1) GUITAR >> TUNER >> WAH >> PITCH SHIFTERS/OCTAVE/COMPRESSORS
The tuner pedal needs to go first in the chain as you need a pure signal to accurately tune your guitar, you risk picking up interference from other pedals if your tuner is at the end of the chain. So stick it at the front connected straight to your guitar.
Next up you have the Wah >> Pitch Shifters/Octave/Compressors. These need to be early in the chain as they also require a strong and unaffected signal to pick up all the notes you’re playing clearly.
You want these pedals to pick up the pure signal rather than any other effects.
These pedals manipulate your signal so will, therefore, manipulate the signal of any effects you place ahead of them - and potentially sound weird!
STEP 2) OVERDRIVE/DISTORTION/FUZZ >> EQ
Any Overdrive/Distortion/Fuzz & EQ should come next as they amplify or change the harmonic content of your signal. There is much discussion as to whether you should place the EQ before or after distortion as the EQ pedal helps remove/enhance any unwanted bass, mids or treble. So experiment with what sounds better for you!
STEP 3) MODULATION/PHASE/CHORUS/FLANGER
Pedals such as Modulation/Phase/Chorus/Flanger can be particularly noisy pedals, so they need to go after any distortion effects to reduce the risk of enhancing any unwanted noise.
Placing distortion beforehand will actually amplify the sound of the desired effect giving your chorus, vibrato, or phase pedals a nice boost that sounds natural yet powerful.
STEP 4) DELAY>> REVERB >> LOOP PEDALS
Last we have time-based effects and looper pedals. The order should be Delay >> Reverb >> Loop Pedals. You want to put delay and reverb at the end of the signal so you don't end up with a muddy sound.
For example, you want to add a delay to everything you’re playing. If you put a delay at the start of your chain and hit a distortion pedal, you will distort the delay rather than the guitar line you’re playing.
The entire signal including the effects you're using will sound better when you add reverb AFTER your pedals and less muddy. So consider placing them at the end of your pedalboard. We place loop pedals at the end for the same reason, we want to loop the entire signal, effects included, not just the pure signal.
Again, music is all about experimentation, so change up the order so you get the best sound for your music. For example, you may find that you like a reverb pedal at the start of your chain and a distortion straight after as it muddy’s the tone and gives you a really unique sound.
Your playing is as unique as you are, so experiment with different pedal orders before you Velcro or zip tie your pedals down.
When you want to build a pedalboard, experiment as much as possible. Enjoy creating your own pedalboard and making music!
View a complete range of pedalboards, pedal power supplies, FX pedals, and patch cables over at PMT Online or call into any of our stores nationwide to speak to one of our experts about setting up your perfect pedalboard.
Updated: 2020-06-17