We show you how to mic a drum kit and offer and offer a beginner’s guide to drum mic placement featuring the Shure PGA microphones for drums
For the longest time, drum mic techniques have been under serious scrutiny and caused much discussion and the age old question of "How To Mic A drum Kit" has caused first time recording artists and engineers many a headache. ‘What’s the best way to record a snare?’, ‘how do I record a kick drum?’ or even questions like ‘how do I stop bleed from cymbals creeping in?’ are some of the major questions that are likely running through your head. Thankfully, mic’ing up drums and drum mic placement in general doesn’t have to be a huge operation, as there is a selection of microphones designed to make your life easier, and even offer easy placement so you can get the best drum sound as quickly as possible.
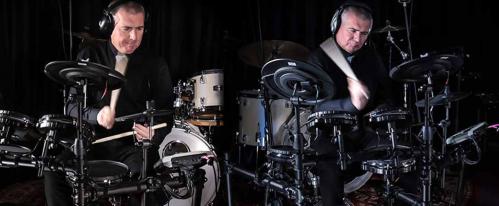
In the video below, our drum expert Josh discusses the easy way to mic a drum kit and offers some insight into drum mic placement techniques that will help you get the best sound, all without a studio or engineer.
Feel free to watch the video and read on below where we delve a little deeper into the techniques used and the ideal microphones that will help you get the perfect sound including the PGA microphones from Shure as well as a few industry standards that Shure make.
Step 1: Get a decent room
A good size room is essential, but of course we know that you might not necessarily have access to a “live” room made of stone or wood, so if you’re recording drums in your garage (just like the Foo Fighters did with Wasting Light), or your spare room that’s totally fine. Even if you’re recording your drums in your spare bedroom that’s fine too - in fact it can make for a very unique sound! Just make sure it’s not so small as to kill the “vibe” of the recordings.
A nice square room, kitchen or bathroom will get a great sound from your drums, just remember to either acoustically treat the room, or add some acoustic filters or baffles around as that will stop some of the spill and really concentrate your drum sound so you get the best recording. we recommend Auralex Wedgies Studio packs as they can be placed on your wall to reduce the sound and spill. You could have the best microphones in the world, but if your room sounds garbage, you won’t get a nice recording. if you don't have the budget for acoustic treatment, you could place pillows on chairs around the room or even hang up blankets - a great budget friendly trick used by home studio owners.
Step 2: Point your mics towards the centre

It should go without saying, but not a lot of people realise that the next major step (and one of the most important) is to ensure you’ve pointed your mics towards the centre of your drums. This way you get a nice full-bodied sound and the mic doesn’t focus on any rim shots or unwanted harmonic frequencies from the drum ring/side of the drum.
For snare drums, we recommend the industry standard Shure SM57, for rack toms we recommend the Shure PGA 98D microphones as they can easily clip on to your drum and for floor toms we thoroughly recommend the Shure PGA56 dynamic microphone which can also be used for snare drums.
Step 3: Perfect distance

When looking at how to mic a drum kit, distance from drum to mic is very important. You don’t want to get too close so the drum sound can’t “breathe” before it gets to your mic, but you don’t want to get too far away so that the snap and quality of the sound is compromised. The best distance is the three-finger method. Measure three fingers between drum skin and your mic for a great sound that really captures the quality of your drums.
Step 4: Mic’ing up overhead microphones with the XY Method

An important part of getting a “vibey” feel from your drums and a great way to record high output drums such as cymbals is to use overhead microphones. This is an essential part of recording drums and a key aspect you need to get right.
However, as you are using two microphones to record the same sound source, it can cause phasing issues, where one mic essentially cancels out the other and there is an audible “uncomfortable” feeling when you listen back – like something is missing.
In the video, Josh tells us that he uses the XY placement technique that gives you the least amount of phasing issues.
The best way to achieve this is to have the microphones close together and at a 45 degree angle, that way you drastically reduce any phasing issues and get a better sound via your recordings.
We recommend the Shure BETA 27 Instrument Condenser Microphone for use with overhead drum mic’ing.
Its also important to make sure that your snare and bass drum are as centred as possible, that way your overhead mics pick up the sound of the drums from a distance adding more weight to your overall sound.
Step 5: Bass drum mic placement

There are two key ways to mic a bass drum.
The first is to cut a port hole in your bass drum outer skin (the part that faces the audience) and place the mic directly facing inside the hole. We recommend the Shure PGA52 as this is a fantastic mic for lower frequencies, providing not only the punch and attack of your bass drum but the deeper sonic qualities too.
The inside microphone we’ve used and recommend is the industry standard Shure Beta 91A Boundary Kick Microphone. This sits comfortably inside your bass drum and picks up the deep low frequencies, providing a huge beefy sound. This slides through the porthole and sits on top of your blanket or pillow whilst you record your drums. There’s not a lot to really get wrong with this one, as you simply leave it in the middle of the bass drum and let it do its thing!
And that’s about it!
Of course, these are just recommended drum mic placements so when you thinking about how to mic a drum kit, you have a general guide on the best way to place your microphones.
Whether you’re recording drums at home, in the garage or in your home studio you should be able to get a nice sound out of your microphones, and enjoy a fruitful recording session with drums that sound great in the mix!
Shure PGADRUMKIT6 Drum Microphone Kit – an all-in-one solution

Need a full drum kit microphone package? Check out the Shure PGADRUMKIT6 Drum Microphone Kit which includes everything you need to mic up drum kits for the stage and studio, including a host of industry standard microphones. You get 1 x PGA52 cardioid dynamic kick drum microphone, 2 x PGA56 snare/tom microphones, 1 x PGA57 cardioid instrument microphone and 2 x PGA81 condenser microphones in the box - you also get all the mic clips and cables you need too!
Just add your own interface and you’re good to go! This is a cheaper alternative to collecting a selection of microphones over time, allowing you to record in high quality straight away. If you're wondering how to mic a drum kit, this is your easiest option.
Check out our demo video below.
Shop a full range of Shure PGA microphones over at PMT Online today or call in to your local PMT store to speak to our experts about your needs as we can help you get the best sound possible with any budget in mind. We can also show you exactly how to mic a drum kit and get you the best mic for the job.