From Truss Rod Adjustments To Basic Cleaning, We Take You Through The 'Must Knows' Of Proper Guitar Set Up and Maintenance
We take a look at a few guitar set up techniques to help you make adjustments easily as well as some quick tips on cleaning your guitar.
PMT GUITAR SETUP - BRING YOUR GEAR TO PMT FOR PROFESSIONAL SET UPS
Need your guitar or bass setting up? Need an acoustic guitar set-up? Contact your local PMT store for details on set-up costs - it's not as expensive as you think*.
We have dedicated guitar technicians and have the ability to facilitate set ups, repairs and modifications on or off-site, across all stores. Contact your local PMT store to speak to our technicians about guitar setup costs for updated prices. *Costs vary depending on work required and prices are subject to change.
FIRST UP: THE ELECTRIC GUITAR
Before we begin, it's worth mentioning that all of the guitars to come through PMT (and hopefully any instrument retailer) have undergone a full set-up process prior to the sale. To begin this article, we are going to start with the electric guitar, covering each of the topics listed below so that after reading you should have a much stronger understanding of how to get your guitar playing at it's very best.
TOPICS TO COVER:
- Neck Bow & Relief (straightening a bent guitar neck via truss rod)
- String Height (nut and saddle heights explained)
- Intonation (is your guitar really in tune?)
- Cleaning Up Noisy Electronics (stop crackling sounds or noisy jack inputs)
- How To Clean Your Guitar
- Storage
NECK BOW & RELIEF: USING THE TRUSS ROD
When it comes to guitar set up, personal preference is a big part of it. While there are certain parameters to follow, we are going to be showing you how to make certain adjustments so that you can practice and establish what works best for you.

WHAT IS A TRUSS ROD?
The truss rod is a metal bar running length ways down the center of the guitars neck. It's used to either straighten out or bend the neck. Tightening the truss rod will essentially raise the middle of the neck towards the strings, adding a 'hump', while loosening it will cause the middle of the neck to sink. Looking down the guitar neck at the angle shown above is a good way to determine whether or not your truss rod needs adjusting.

The truss rod can usually be accessed through the guitar headstock (left) via allen key. Turning the allen key right will tighten the truss rod, while turning left loosens it. Be sure to only make small adjustments of around 1/4 of a turn each time and allow the neck settle overnight as the wood re-adjusts to its new position.
Properly adjusting your truss rod and straightening out the neck is a huge step towards making your guitar play great, many times when players find themselves with an annoying string buzz, it isn't so much that the string heights need to change, but the neck itself. This is to allow the strings to vibrate without touching the fingerboard.
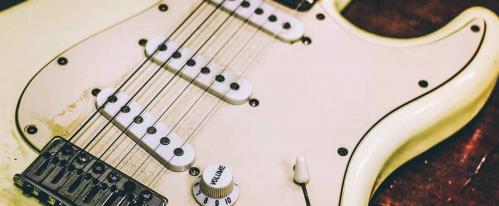
STRING HEIGHT ADJUSTMENT
Adjusting the height of your guitar strings is usually a fairly simple process yet crucial to a good guitar set up, however this does differ depending on what type of bridge you have on your guitar. Also note that string height is very much dependent on the preference of the player and shouldn't be seen as something set in stone.

Here we see a Gibson 'Tune-O-Matic' bridge. To adjust the string height, one simply has to turn the notched posts seen on either side of the bridge. These are pretty self explanatory and very simple to get to grips with with no tools required. Be sure to loosen your strings first or it might prove difficult to make adjustments.

Above we see a Fender 'saddle' style bridge. These are also very easy to adjust and allow for more precise tweaking as each saddle is held up by two screws, allowing you to adjust the angle and height of each individual string. These bridges will require a very small allen key so be sure to keep one handy for the next time you do a guitar set up!
When adjusting string heights you may choose to experiment until you find what works or alternatively, you can find a manufacturers recommended string height though a quick google search.
INTONATION: IS YOUR GUITAR IN TUNE?
Intonation refers to your guitars overall tuning across all of the frets. What you're going to be checking here is the actual length of the string. If we play a note on any string at the 12th fret, it should be the exact same tuning as a natural harmonic at the same position.
This can easily be checked with an accurate tuner but essentially, if you find that the fretted or 'held down' note is higher or 'sharper' than the harmonic, the saddle of that string will need to be moved forward, towards the neck until the tuning's are the exact same.
Doing this for each string will ensure that your guitar is indeed in perfect intonation and tuning. On both 'Tune-O-Matic' and 'Saddle' bridges, you will find individual screws for adjusting the string forward and backwards.
It's all very simple when you wrap your head around it!
FIXING A NOISY OR CRACKLING GUITAR
If you've ever had a guitar up on a wall for an extended period of time, you may notice a slight crackle coming from the output jack. This is generally caused by humid environments having their toll on the guitars wiring. To combat this very common and annoying occurrence, simply spray some contact cleaner onto your guitars wiring. Contact cleaner should be easily available from any hardware store, lasts for ages and tends to fix a lot of noise issues players face over time. It's also great for pedals and squeaky wah pedals!

WANT TO MAKE SOME EASY GUITAR SET UP ADJUSTMENTS? WATCH OUR ESSENTIAL GUITAR MODIFICATIONS VIDEO!
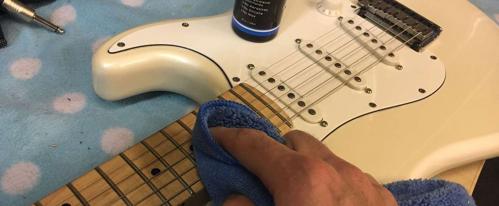
HOW TO CLEAN YOUR GUITAR
Guitars are delicate instruments and will show signs of wear if not properly looked after. When it comes to cleaning your instrument, we would only suggest using recommended guitar cleaning products. You can find our full list of guitar cleaning accessories and guitar care products here.

As a stand alone product, we recommend the new Dunlop 65 cleaner-polish for the guitar body. It works a dream and comes with its own microfiber cloth. You can also read a list of what we think are the best guitar polish and guitar cleaning kits available in our blog.
WATCH OUR VIDEO ON HOW TO CLEAN YOUR GUITAR - IT'S EASIER THAN YOU THINK!
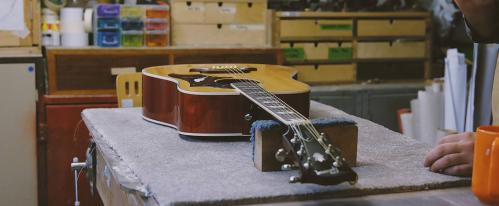
ACOUSTIC GUITAR SET UP
If you've made it this far then you already know the main factor with acoustic guitar set up and that's the neck. Like the electric guitar, an acoustic guitar should also have it's own truss rod running down the neck.
DON'T EXPECT MIRACLES!
Unlike an electric guitar with many parameters to adjust, a good acoustic guitar set up simply comes from a well put together acoustic guitar. With that said there are three things you can change to greatly improve the set up.
First off we have the truss rod, we've already explained this one but you can use this to straighten out the neck which is a great start. (Truss rods also tend to be located at the bottom of the guitar neck for acoustics as opposed to electric guitars.)
The tricky part comes when adjusting the bridge which as you may see (if you have an acoustic guitar in front of you), doesn't lend much room for adjustment.

Above you can see an acoustic guitar tail piece, the part were going to be focusing on however is of course the saddle. Lets assume your guitar neck is lovely and straight and your truss rod is adjusted to perfection, what can we do here to raise or lower the strings?
RAISING THE SADDLE
Acoustic guitar saddles are usually loose which allows for them to be taken out very easily. Although it may sound primitive, the best way to raise a saddle is to place thin paper or plastic cutouts underneath it until the strings are at a desired height. If you find that one side of the saddle needs raising more than the other, try cutting a strip of plastic or paper to half the length of the saddle and positioning it underneath the side needing that extra boost.
LOWERING THE SADDLE
You've probably guessed it but in order to lower an acoustic guitar saddle, you'll be wanting to sand the base down on some VERY light sandpaper. Since this is irreversible we suggest doing this extremely gradually!
As with anything maintenance related, we would recommend taking the guitar to a trained repair tech in order to craft a new bone saddle or alter the existing one. If you are a handy person, you may find doing it yourself to be faster and more cost effective.
ADJUSTING THE NUT

Much like the bridge saddle, the nut can also be raised and lowered in the same way!
This article is aimed at beginner or intermediate players who may not have taken the time to learn these tips. We've left out unnecessary language and confusing terms so that you better understand simply HOW to adjust all the parameters.
The point is to do some research so that when you read the measurement terms and mumbo jumbo online, you'll know how to make adjustments and make better sense of it all. We've said it before but its absolutely relevant that this is a personal preference thing.
Some of the best guitar set up's we've played were down to the owners making trial and error adjustments by eye and ear.
Numbers are just the guide. We know with some practice, determination and patience you'll be setting up guitars like a pro soon!